Due to fan and color wheel failure issues there have been: (1) Many people looking for inexpensive ways to repair their projectors. (2) Many people offering up their broken projectors for parts at cheap prices or even the price of shipping costs alone. Recently I needed to replace the color wheel in my personal PE7700 and decided I would go through the entire projector performing some-what of a Tune-Up, using a parts projector I had sitting around. During the process I decided I would try to create a reassembly guide that showed every step to reassemble the projector from a completely disassembled state, including which screws go where if you got them mixed up.
If you have only a partially disassembled projector, just scroll down the page and start where your projector is at in the process. I have tried to identify things to look for in your projector that might need to be replaced or address possible mistakes made in the assembly process. If you run into an issue when your working on your projector and could suggest improvements to this guide please email me david at functionalchaos dot net.
First, lets identify the list of screws used in the assembly of the PE7700. I will identify the screw types used in each assembly step. You can reference this list if you need help identifying the correct screw to use. I hand measured the screws my self with some dial calipers, but the numbers may be off slightly from any manufactures specifications. If you measure a screw to compare to my list, just measure the shaft of the screw (From the bottom of the head or counter sink, to the end of the screw).

- 4.0mm - Pan Head - Fine Thread - Silver
- 8.0mm - Pan Head - Fine Thread - w/K-lock Washer - Silver
- 6.0mm - Counter Sink Head - Fine Thread - Silver
- 7.5mm - Counter Sink Head - Coarse Thread - Silver
- 8.5mm - Pan Head - Coarse Thread - Silver
- 6.0mm - Trus Head - Fine Thread - Black
- 6.5mm - Pan Head - Fine Thread - Black
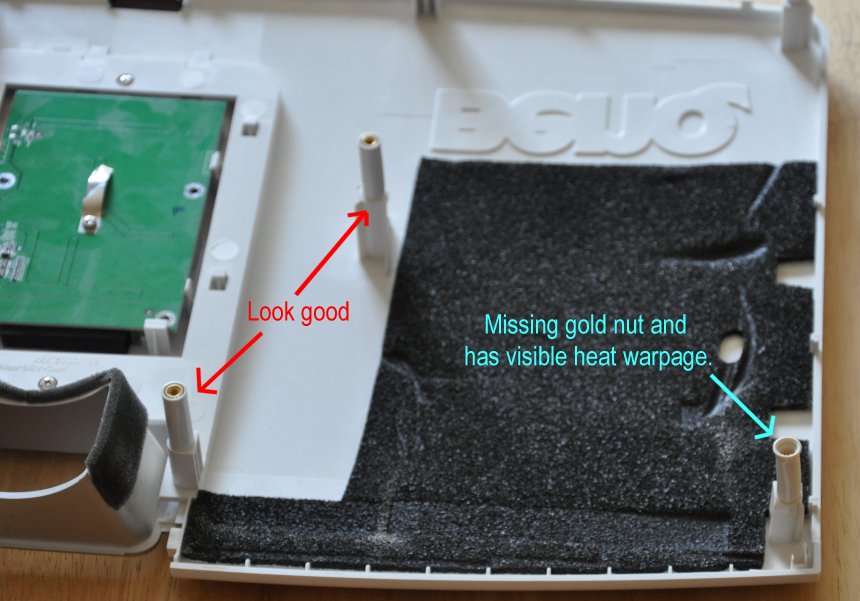
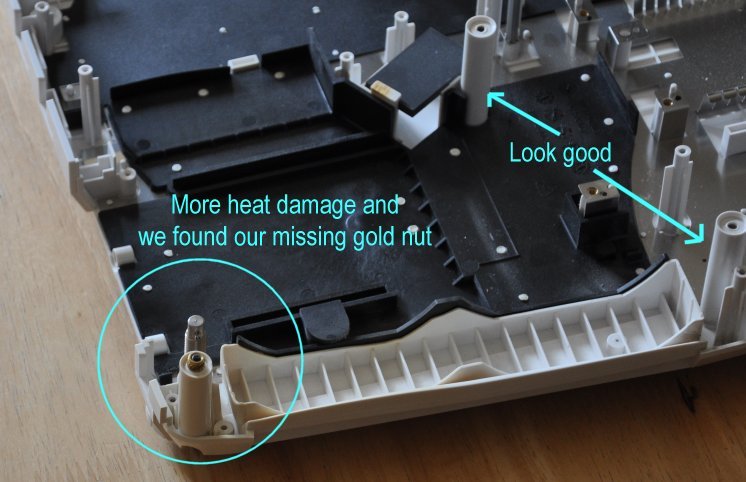
First you want to grab the top and bottom of the projector plastic case and evaluate them for damage. If you have a spare parts projector you may be able to find the best case part from each projector. Another option if both projector parts are damaged is to perform some repairs by cutting off plastic posts or other parts and using some good super glue to repair a bad part. Remember, if the case has a bad post it's not currently helping provide any clamping force. If this is your circumstance then your not risking any loss by cutting and gluing another post in its place. Worst case is you will still have no clamping force in that area. You can also ignore the problem and hope it won't be an issue, if it's just one post out of seven, you will probably be okay.
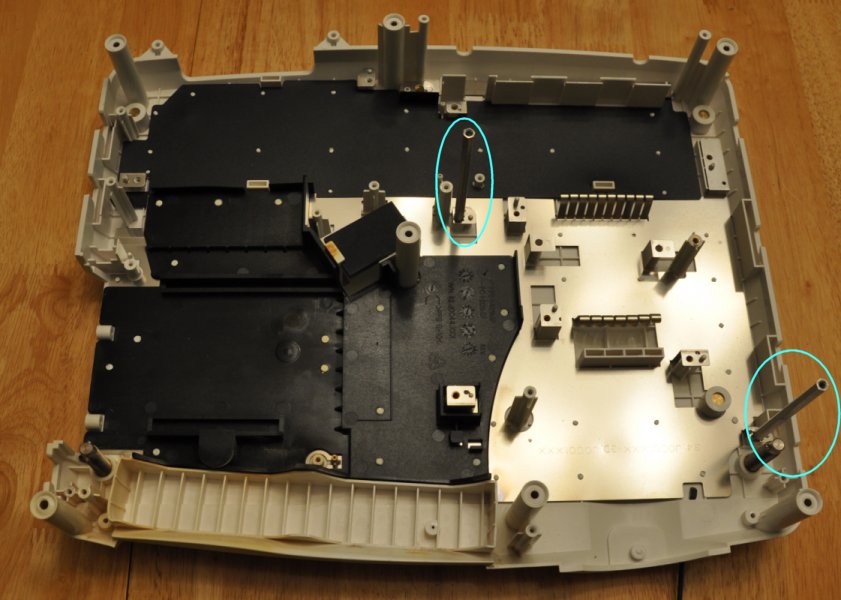
Start by laying out the case bottem or base of the projector in front of you. There should still be two long stand-off's installed in the base as they don't hold down any parts and should not have needed to be removed. See picture below for reference.
- 1x - 8.0mm - Pan Head - Fine Thread - w/K-lock Washer - Silver
- 3x - 8.5mm - Pan Head - Coarse Thread - Silver
- 2x - Large Stand-Off's
